
Embarking on removing a toilet tank unveils a realm where precision and expertise merge. As an experienced plumber, I’ve honed a method that ensures seamless removal.
This guide delves into the art, walking you through steps from isolating the water supply and loosening bolts to delicately lifting the tank off the bowl.
Embrace these insights, and you’ll navigate the removal process like a seasoned pro.
Remember, a meticulous approach safeguards against mishaps and enhances your plumbing prowess.
Let’s delve into the intricacies of toilet tank removal, painting a portrait of proficiency in every twist and turn.
Do Toilet Tanks Come Off?
Certainly, toilet tanks are engineered to be detachable from the bowl, allowing for versatile maintenance and repair options.
This design feature facilitates the accessibility needed to address issues that may arise over time. Whether it’s a minor repair, part replacement, or thorough cleaning, the ability to remove the toilet tank grants convenience and efficiency.
Manufacturers understand the importance of a user-friendly approach to toilet maintenance.
Taking off the tank without altering the bowl ensures that essential tasks can be carried out without extensive disassembly.
This simplifies the process and minimizes potential disruptions to the entire toilet system.
Furthermore, the detachability of toilet tanks aligns with the principles of sustainability.
It enables components to be individually serviced or replaced, potentially extending the toilet’s lifespan and reducing unnecessary waste.
So, rest assured that if the need arises, the removable nature of toilet tanks allows for effective and focused attention to specific areas of concern.
Also Read:
How To Fix A Leaky Toilet Tank | Your Quick Guide To Relief
Tankless Toilet Problems | Is It Residential Home-Friendly?
How Does A Tankless Toilet Work | Tankless Toilet Mechanics
What Tools Do You Need To Remove A Toilet Tank?
Well, as a plumber, I am quite conscious about my tools. You all know having the right tool to do any task is crucial.
So certainly! Here’s a detailed explanation of the tools needed and their purposes when removing a toilet tank:
- Adjustable wrench or pliers
- Screwdriver
- Towels or rags
- Bucket
- Gloves
1. Adjustable Wrench or Pliers
These tools are used to loosen and disconnect the water supply line from the water inlet valve at the bottom of the toilet tank.
The water supply line is usually connected with a nut and an adjustable wrench or pliers will help you grip and turn the nut to detach the line.
2. Screwdriver
A screwdriver is essential for removing screws or nuts that secure the toilet tank to the bowl. These screws or nuts are typically located underneath the tank, connecting it to the bowl.
Depending on the type of fasteners used, you may need either a flat-head or a Phillips-head screwdriver.
3. Towels or Rags
Placing towels or rags around the toilet’s base will help catch any water that might drip when you disconnect the water supply line and remove the tank.
This prevents water from spilling onto the floor and makes cleanup easier.
4. Bucket
Before removing the tank, you should flush the toilet to drain as much water as possible from the tank. However, there might still be some water remaining.
Placing a bucket under the tank will allow you to catch any water that comes out when you disconnect the supply line and lift the tank, preventing spills and mess.
5. Gloves
Wearing gloves protects your hands during the removal process.
Additionally, gloves can help you get a better grip on various components, making disconnecting the supply line and removing any fasteners easier.
Also Read:
How To Install Bidet On Tankless Toilet | Upgrade Your Toilet
Is Toilet Tank Water Clean | Know Experts Opinions
How To Clean Toilet Tank With Baking Soda | 6 Pro Ways
Toilet Tank Too Close To Wall | How To Fix This Issue
A Step-By-Step Guide To Removing A Toilet Tank With Ease
So here we are at the main topic of this blog, in which I will teach you how to remove a toilet tank without any damage and hustle.
Removing a toilet tank may seem daunting, but it can be done smoothly with the right steps.
Here’s a step-by-step guide to help you remove a toilet tank with ease:
Step 1: Gather Necessary Tools and Materials
Before you start, gather all the tools and materials you’ll need: an adjustable wrench or pliers, a screwdriver, towels or rags, a bucket, and gloves.
Having everything ready will make the process smoother.
Step 2: Turn Off the Water Supply
Find the water shut-off valve on the wall or floor close to the toilet’s base. To halt the water supply, rotate the valve clockwise (righty-tighty).
This crucial step ensures a secure starting point for the toilet tank removal process.
Step 3: Flush and Empty Tank
Flush the toilet, initiating water drainage from the tank. For thorough emptying, press and hold down the flush handle.
This action effectively expels accumulated water, minimizing potential spills and making subsequent steps in the toilet tank removal process more manageable.
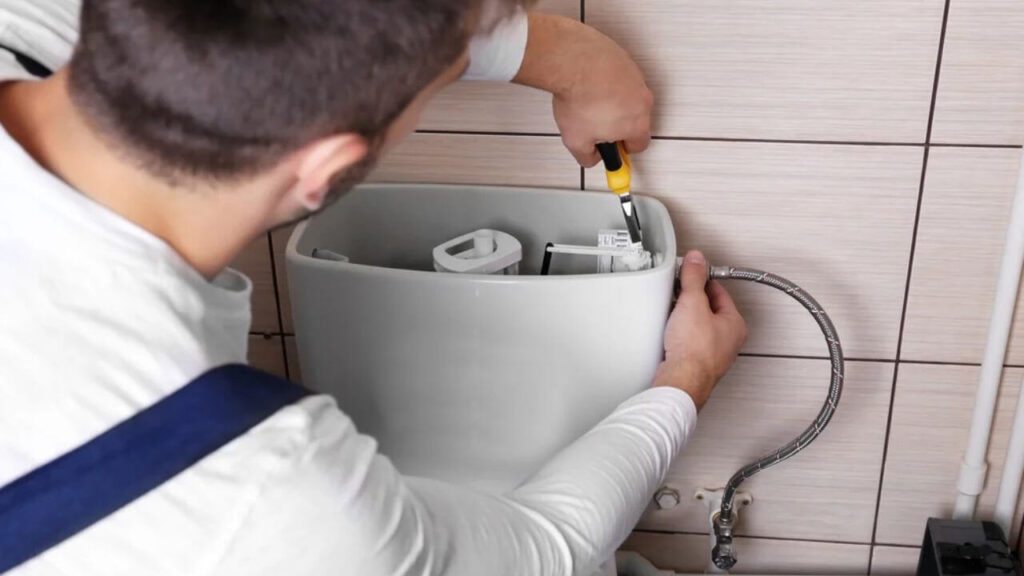
Step 4: Disconnect Water Supply Line
Use the adjustable wrench or pliers to loosen and disconnect the water supply line from the water inlet valve at the bottom of the tank.
Turn the nut counterclockwise (lefty-loosey) until it’s loose enough to remove. Place a towel or rag under the valve to catch any water that might drip.
Step 5: Remove the Tank Lid
With caution, raise the toilet tank lid, ensuring a secure grip. Place the lid aside safely, away from the designated work area.
This precaution prevents accidental damage to the lid and ensures a clutter-free space for the tank removal process.
Step 6: Remove Tank Fasteners:
Look underneath the tank for any screws or nuts securing it to the bowl.
Use the screwdriver to turn the screws counterclockwise or loosen the nuts.
Remove these fasteners, but wait to take them out fully.
Step 7: Empty Remaining Water
Position a bucket beneath the tank to catch lingering water. Gradually elevate the tank, giving it a slight tilt forward.
This maneuver encourages the residual water within the tank to flow into the awaiting bucket.
Meticulousness ensures a controlled drainage process and minimizes potential mess during tank removal.
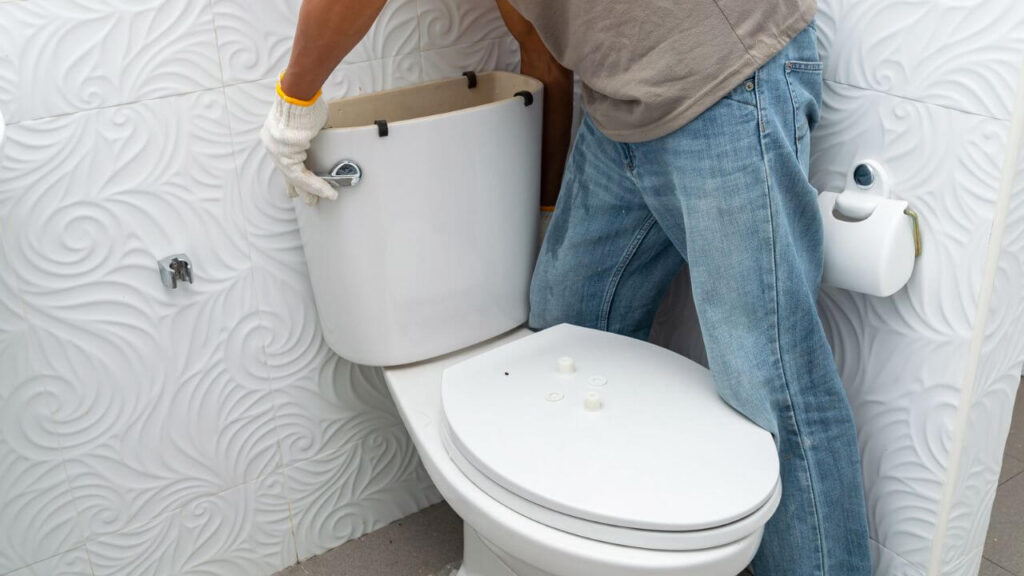
Step 8: Lift and Remove the Tank
Once the fasteners are appropriately loosened and the water has been drained, exercise caution as you raise the tank vertically while maintaining a level position.
This maneuver facilitates the detachment of the tank from the bowl.
Set the detached tank on a stable surface, ensuring a secure and well-supported placement to prevent accidental damage.
Step 9: Inspect and Complete:
Take a moment to inspect the area where the tank was attached to the bowl. Look for any signs of damage, corrosion, or issues needing attention.
If you’re not proceeding with repairs or replacements, you’re done with the removal process.
Step 10: Reinstallation (Optional):
If you’re replacing the tank or making repairs, follow the manufacturer’s instructions for the specific tasks. Reinstall the tank by reversing the steps:
- Carefully lower the tank onto the bowl.
- Secure the fasteners.
- Reconnect the water supply line.
- Turn on the water supply.
Remember to work carefully and deliberately throughout the process to prevent damage or accidents.
If you encounter any difficulties or are unsure about any step, consider seeking advice from a professional plumber.
Also Read:
How Should The Inside Of A Toilet Tank Look
How Long Does It Take To Remove A Toilet | Experts Guide
How Long After Installation Can A Toilet Be Used
Bottom Line
Congrats, you’re now a toilet tank removal expert! With our guide, you’ve got the know-how to tackle this task confidently.
Remember, take it slow, use the right tools, and you’ll be tank-free in no time. Happy plumbing!